
1703 Andros Isle Apt.H-4/Coconut Creek, Florida 33066/703-772-3587/ArtGiftsEtcGroup@yahoo.com
If you don't see what you are looking for, I can digitize it for you !
| Home |
Quilts |
Jennifer's Books! |
Jen's Bags! |
Handmade Sock Monkeys | Embroidery |
Step-By-Step Quilt Blog | About Jennifer |
Jennifer's Photography Prints! |
Links |
Questions and commissions. |
MASTER CONTINUOUS BORDER STITCHING!
I want you to know this will work for all hoop sizes.
You can use this method using any design you want to use as a continuous border or all-over pattern.
I prefer to create the largest design my machines can handle because this cuts down on the number of hoopings per border.
BACK TO BORDERS EMBROIDERY INDEX![]()
 Mark your fabric in the center with Iron Off Chalk. Do not worry about finding the side-to-side center mark. Line up your chalk line with the center mark on the top and bottom of your hoop. You can see the yellow marking tool I use in one of the following photographs. I got mine from JoAnn's fabrics. I call it an Iron Off Chalking Tool. I don't know it's official name. The marking tool comes with some chalk inside. I refill with the same chalk used for pouncing quilt lines. |
 Hoop your fabric leaving enough at the top outside of the hoop for sewing onto your project and hemming. After hooping, move your needle so that it lines up with your chalk line. Then, move your design as far as you can to the top of your hoop and stitch out your design. Before jumping in with both feet, test the chalk on your intended fabric. Pick a corner, mark it and then iron off the line with an iron set to the fabric specifications. Sometimes, on some fabric, the chalk will leave a visable line. (Ask me how I know this!) |
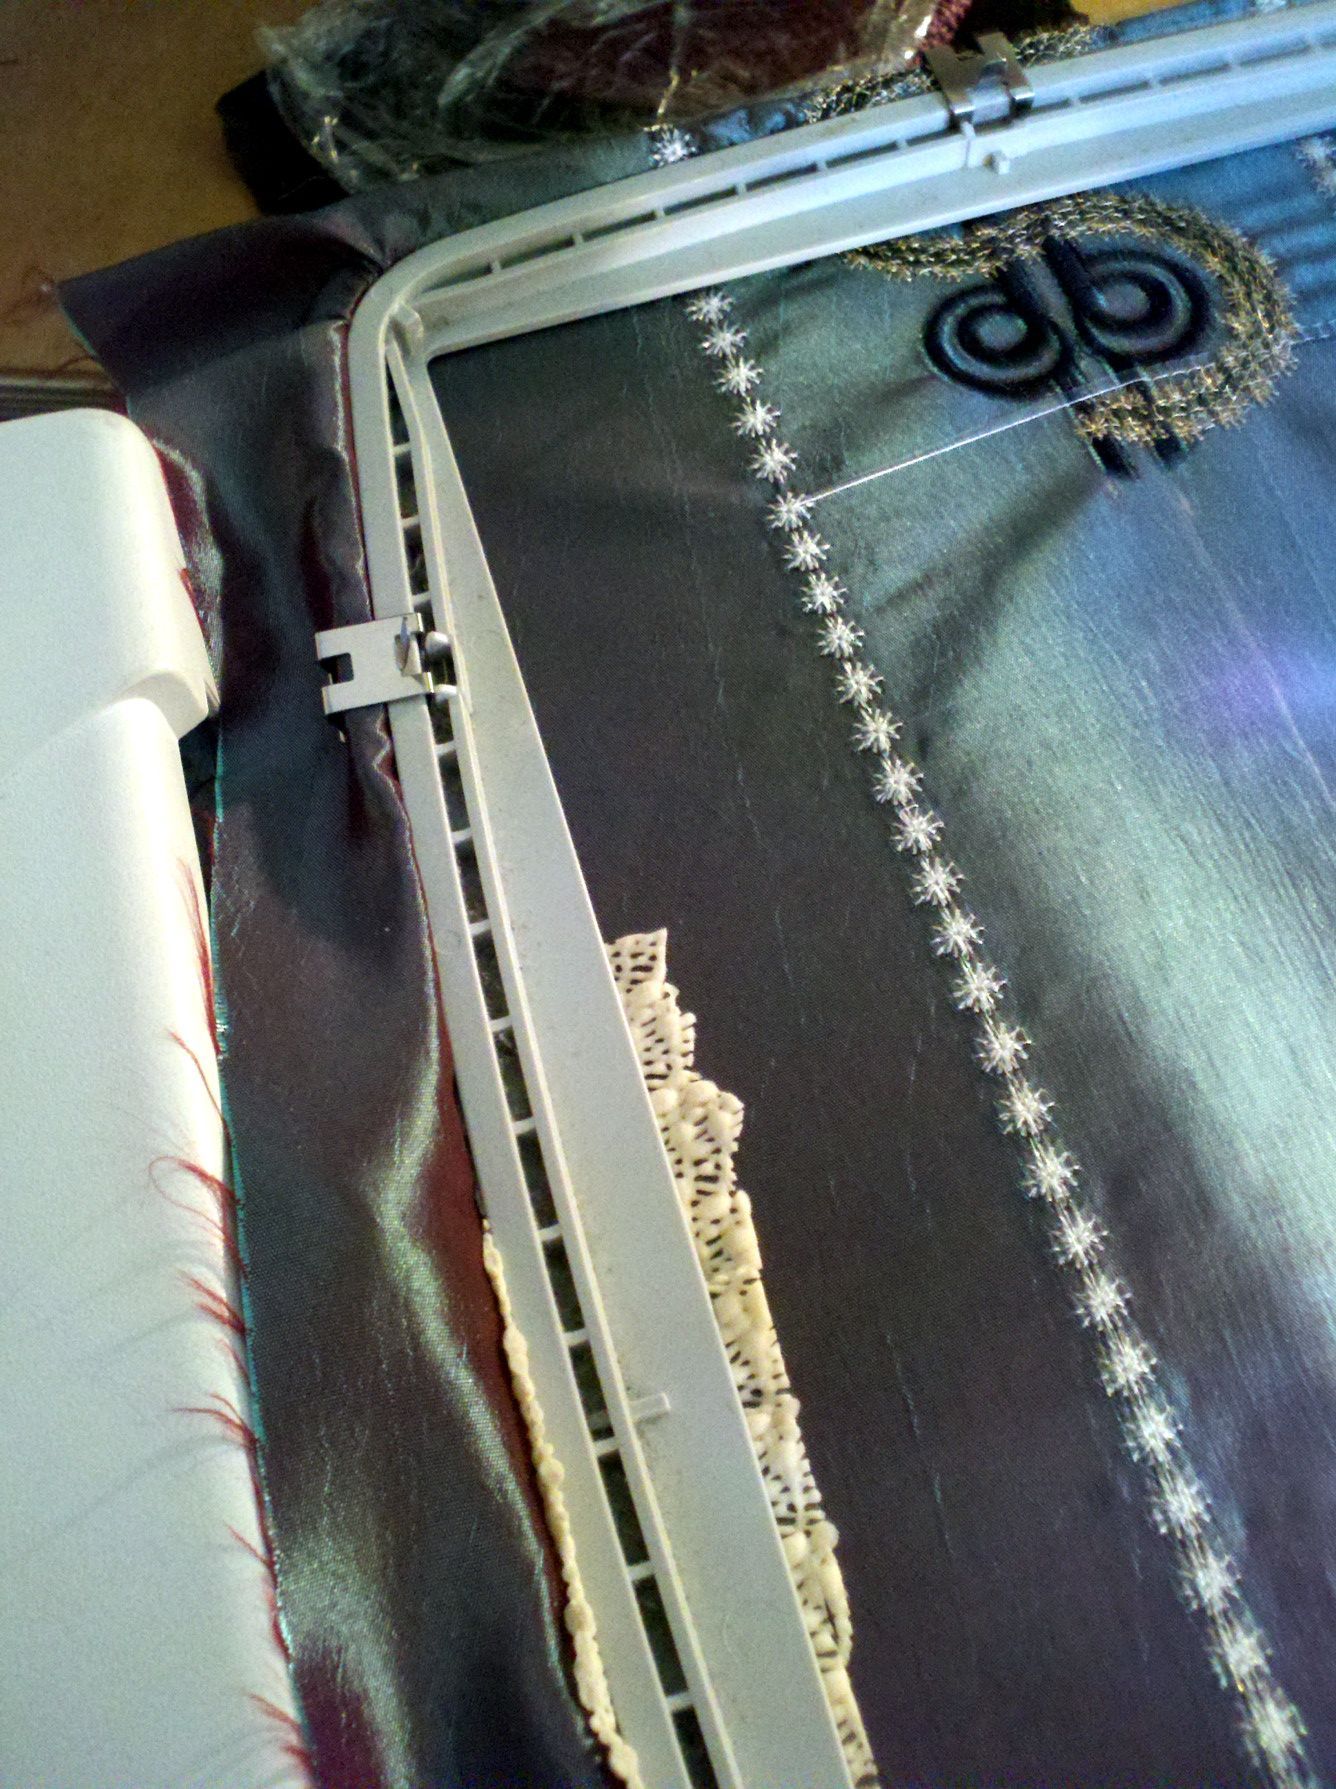
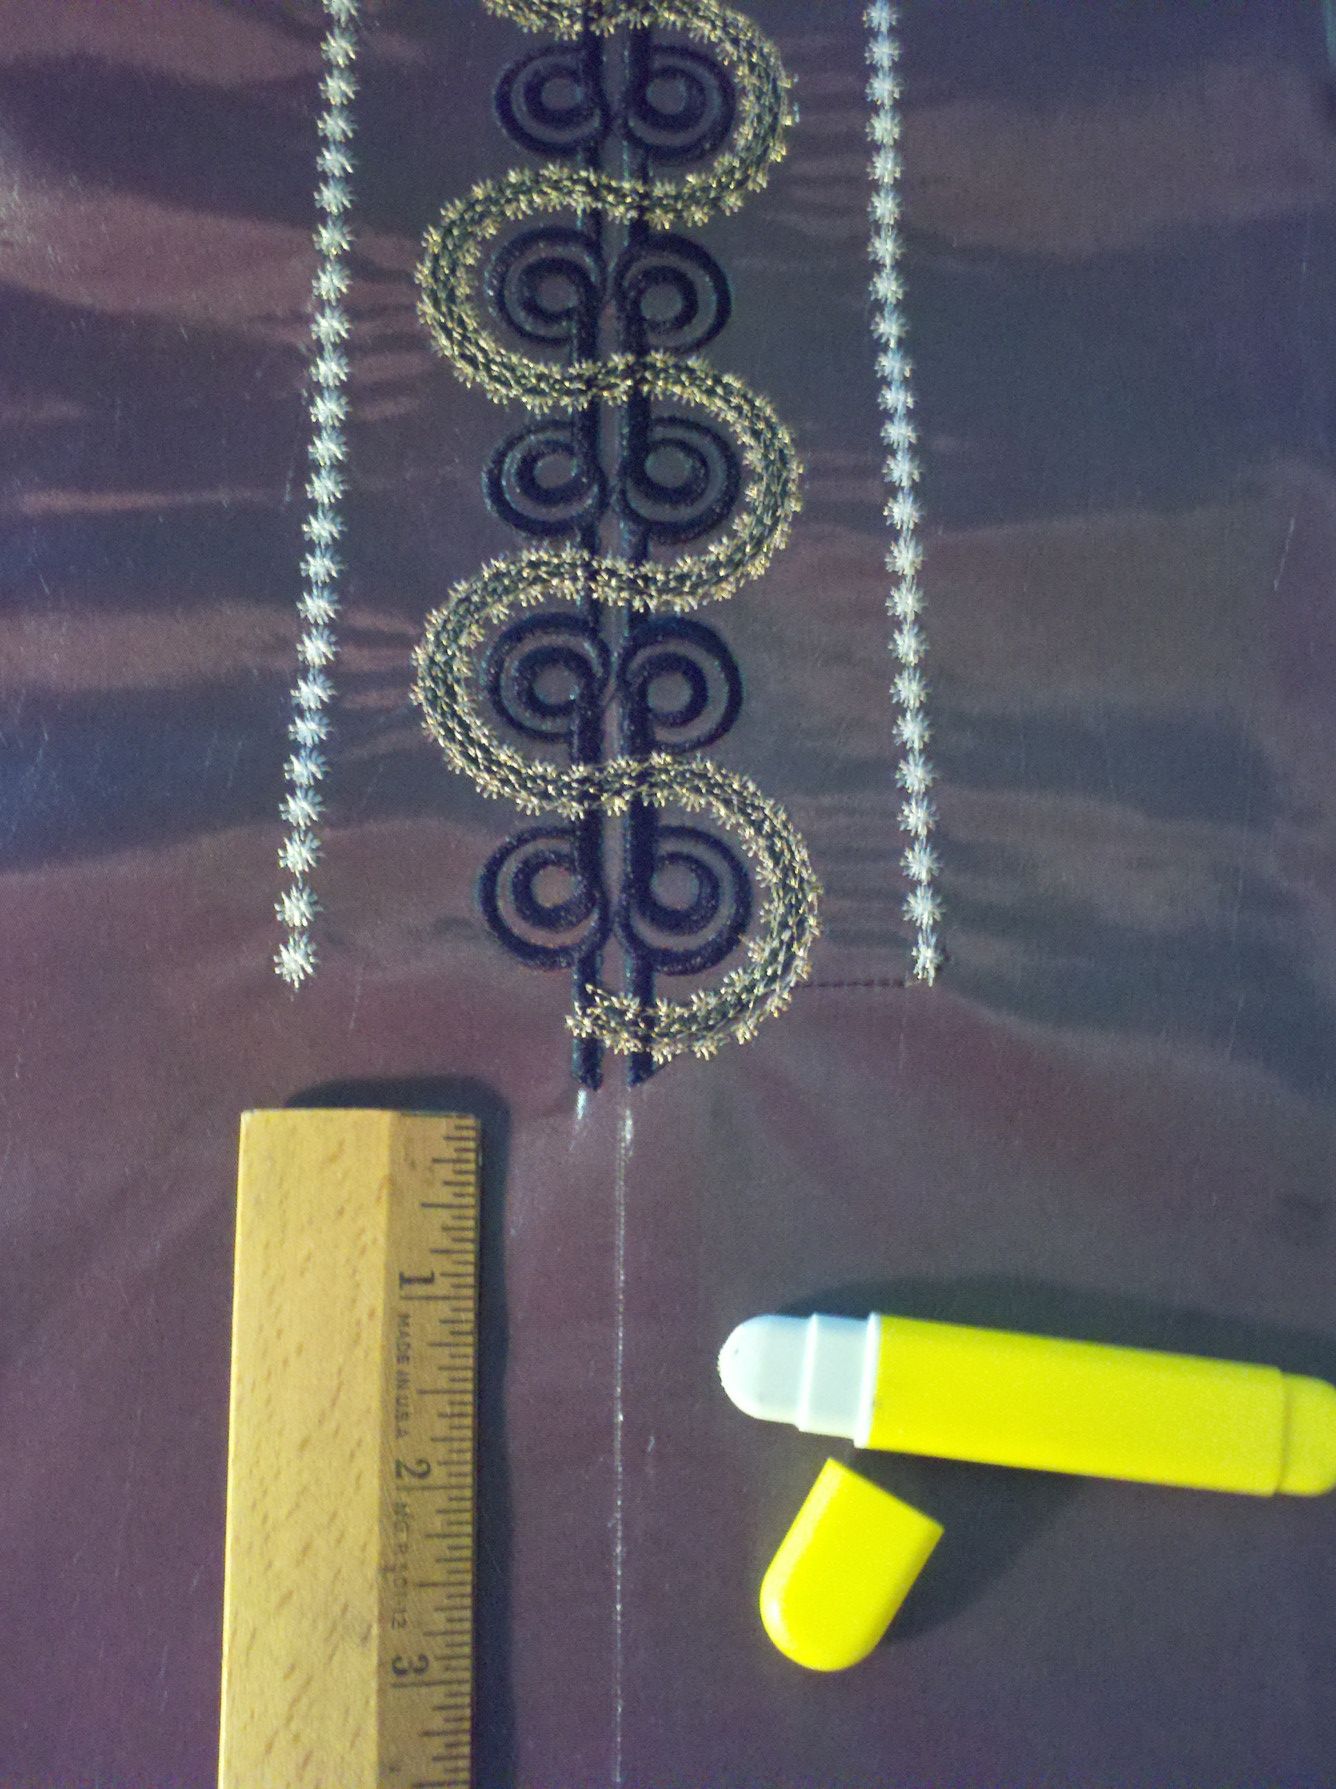 Before you remove your fabric to rehoop for the second stitch-out, measure the distance from the INSIDE top edge of the hoop to the top stitches of the design. This distance is how far down the BOTTOM EDGE of the design will have to be in the hoop for the 2nd hooping. I usually try to come down slightly more because it is easier to move the design into position than it is to re-hoop the fabric. Unhoop and draw a continuing center chalk line from the exisiting chalk line. Rehoop your fabric lining up the chalk line with the center marks on your hoop. |
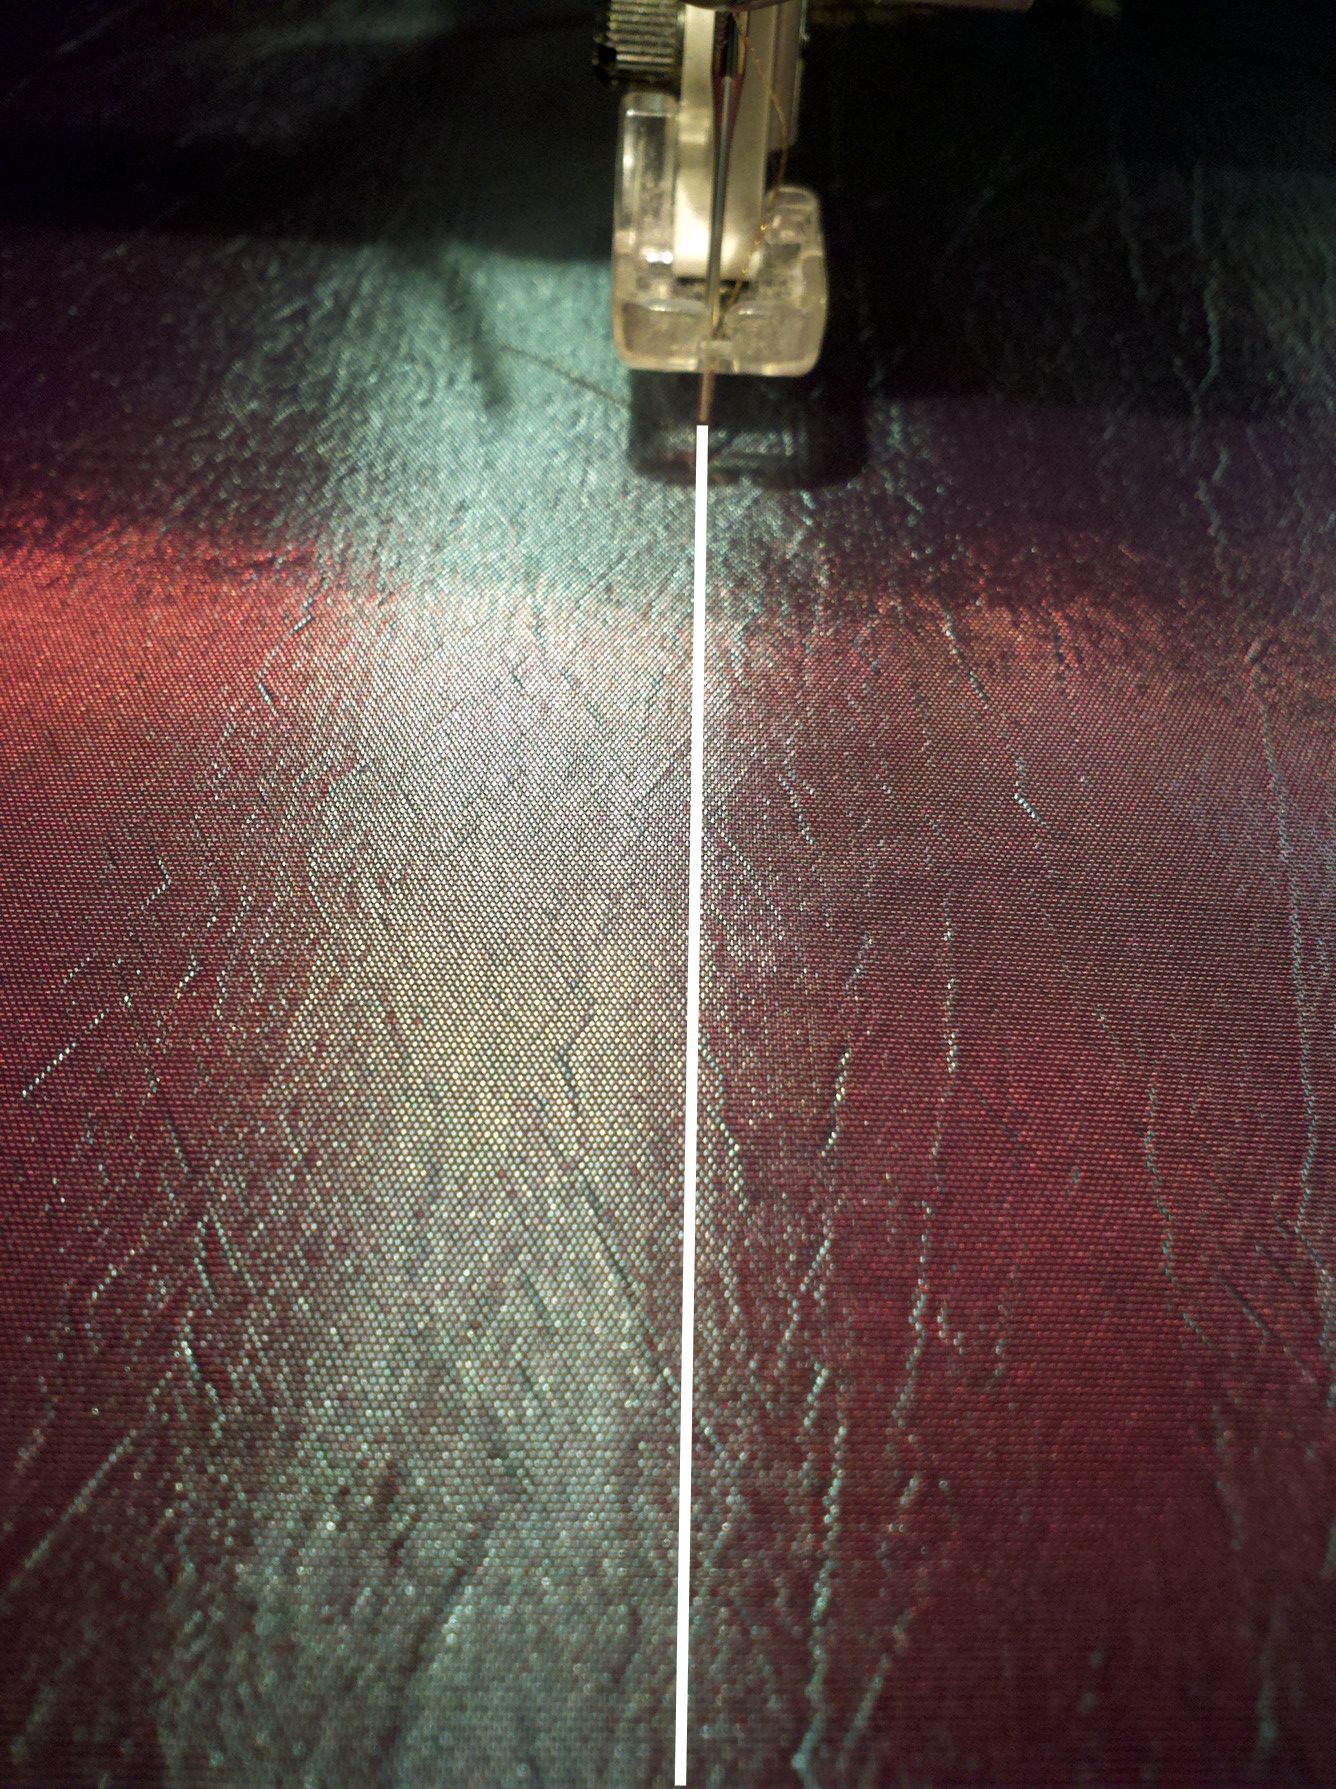
 In this photograph, you can see that I have hooped my fabric so the BOTTOM EDGE of my design is 1 1/2 inches from the top of the inside top of my hoop. I then lined up my needle with the center line. (I exaggerated my line to make it easier for you to see.) To make sure my design is not going to stitch to high or too low, I advance my design stitch-by-stitch checking to see where the first stitches are going to be sewn. Some designs have registration marks that help you find the starting point. These lines stitch at the end and the beginning of the design. This makes it very easy to see if you are all lined up because these will sew directly on top of each other if you have everything in place. Not all designs have registartion marks, but you can still find the starting stitches by advancing through your design and checking where the needle falls. |
 I always stitch in my largest hoop so I can move my design wherever I want. If I use a small hoop, I am limited on how far I can reposition the design. My GEISHA QUILT PEARL BORDER has a wonderful row of 'pearls' that frame each side of the lacy center design These pearls have to be lined up exactly or else the finished border would be a mess. They are, however, perfect for easily double-checking my design placement! I advance through the designs colors until I get to the white pearl color. I then advance my machine stitch-by-stitch watching exactly where the needle lands. The needle needs to fall just at the bottom of the pearl from the previous stitching . If I am too high and my pearls overlap, I move my DESIGN down a stitch or two until it is just right. If I am too low, I move my DESIGN up until it is just right. If necessary, I move my DESIGN left or right until the pearls line up exactly. It is my understanding that some machines allow only the needle placement to be moved, some machines allow you to move the design left, right, up and down, and some will let you do both. My Janome and my Viking Designer1 will allow me to move both. You have to know your machine, move either the needle or the design into place to achieve success! Once I am certain the pearls are lined up without a gap or overlap, I know the rest of my design will be in place too. |
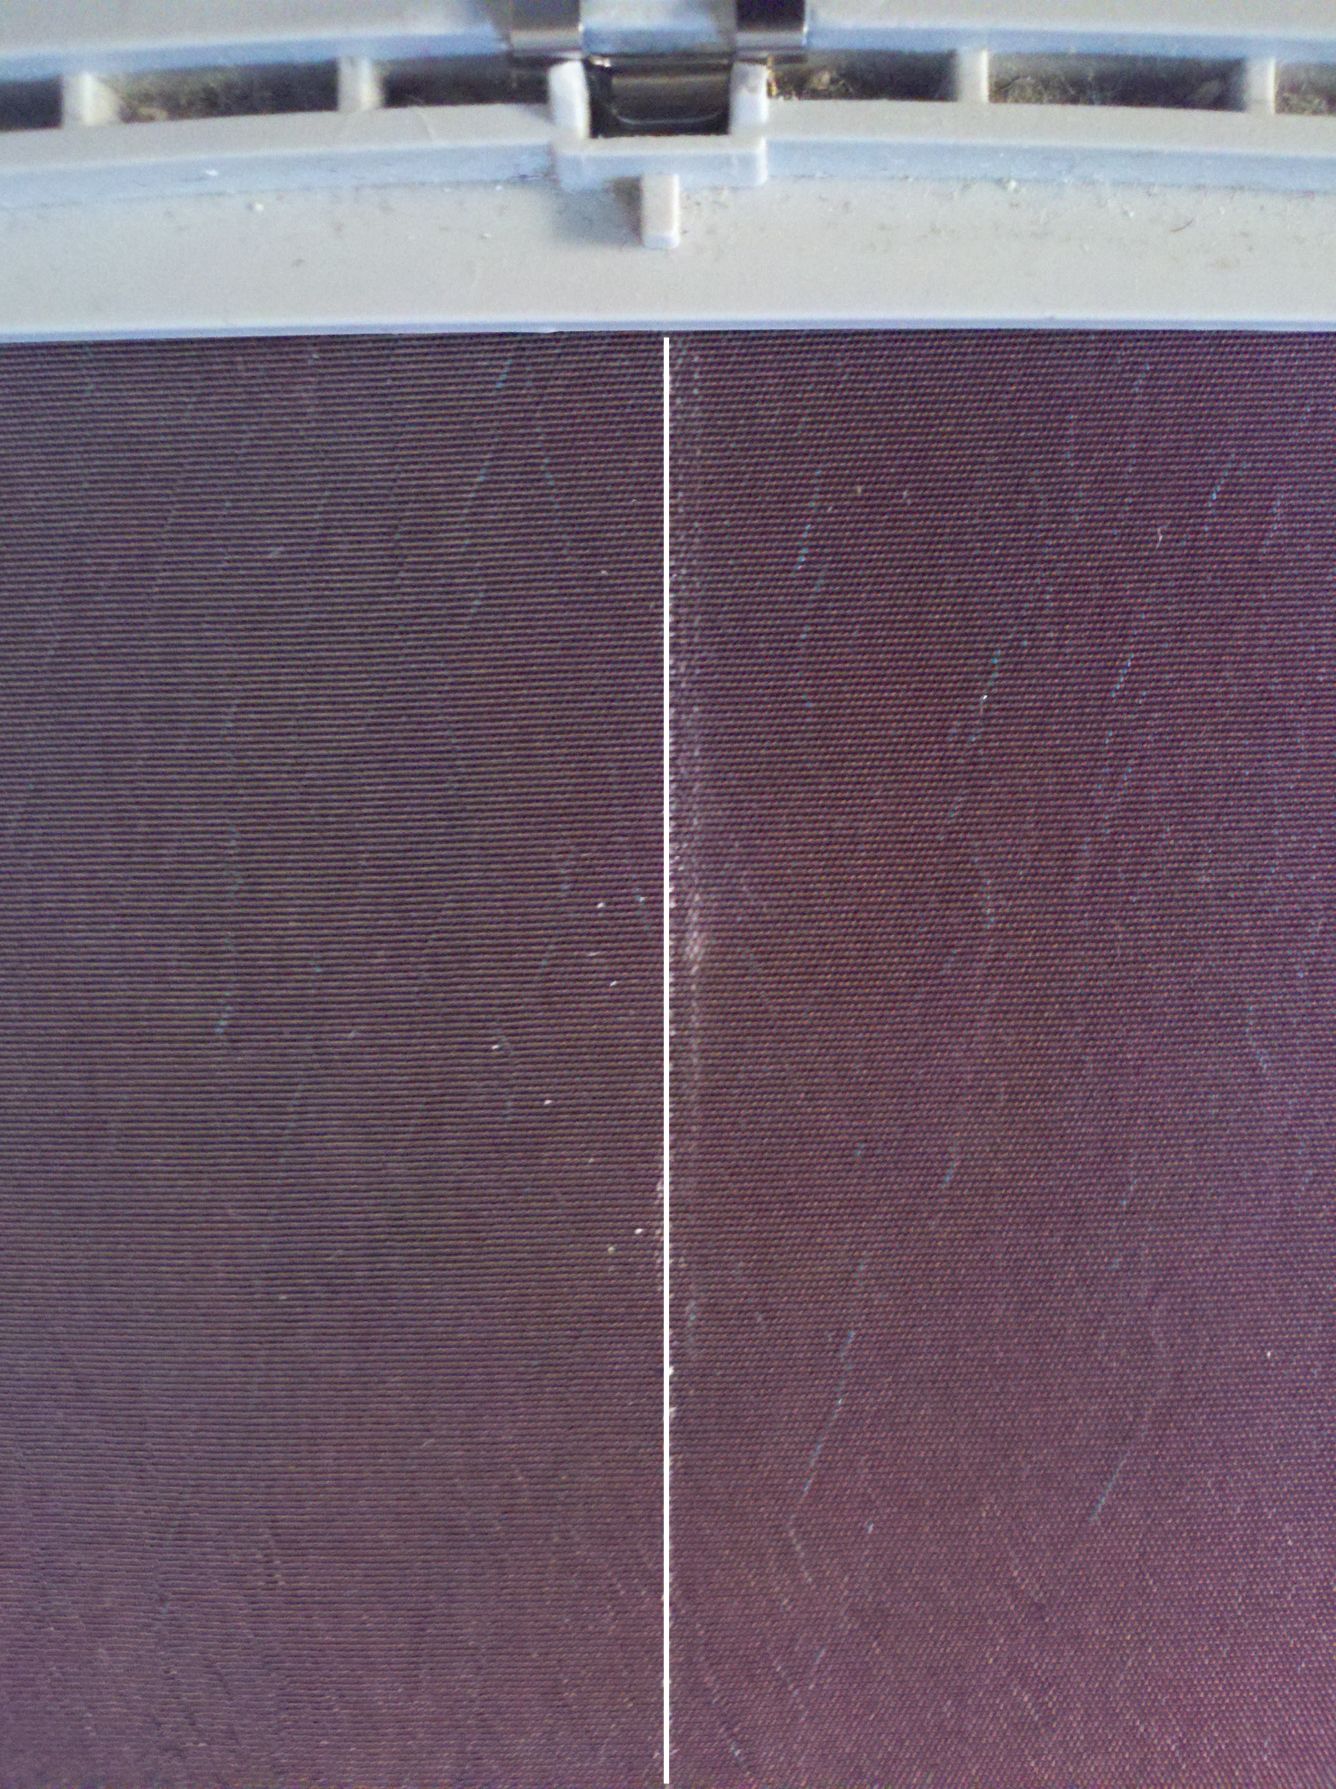
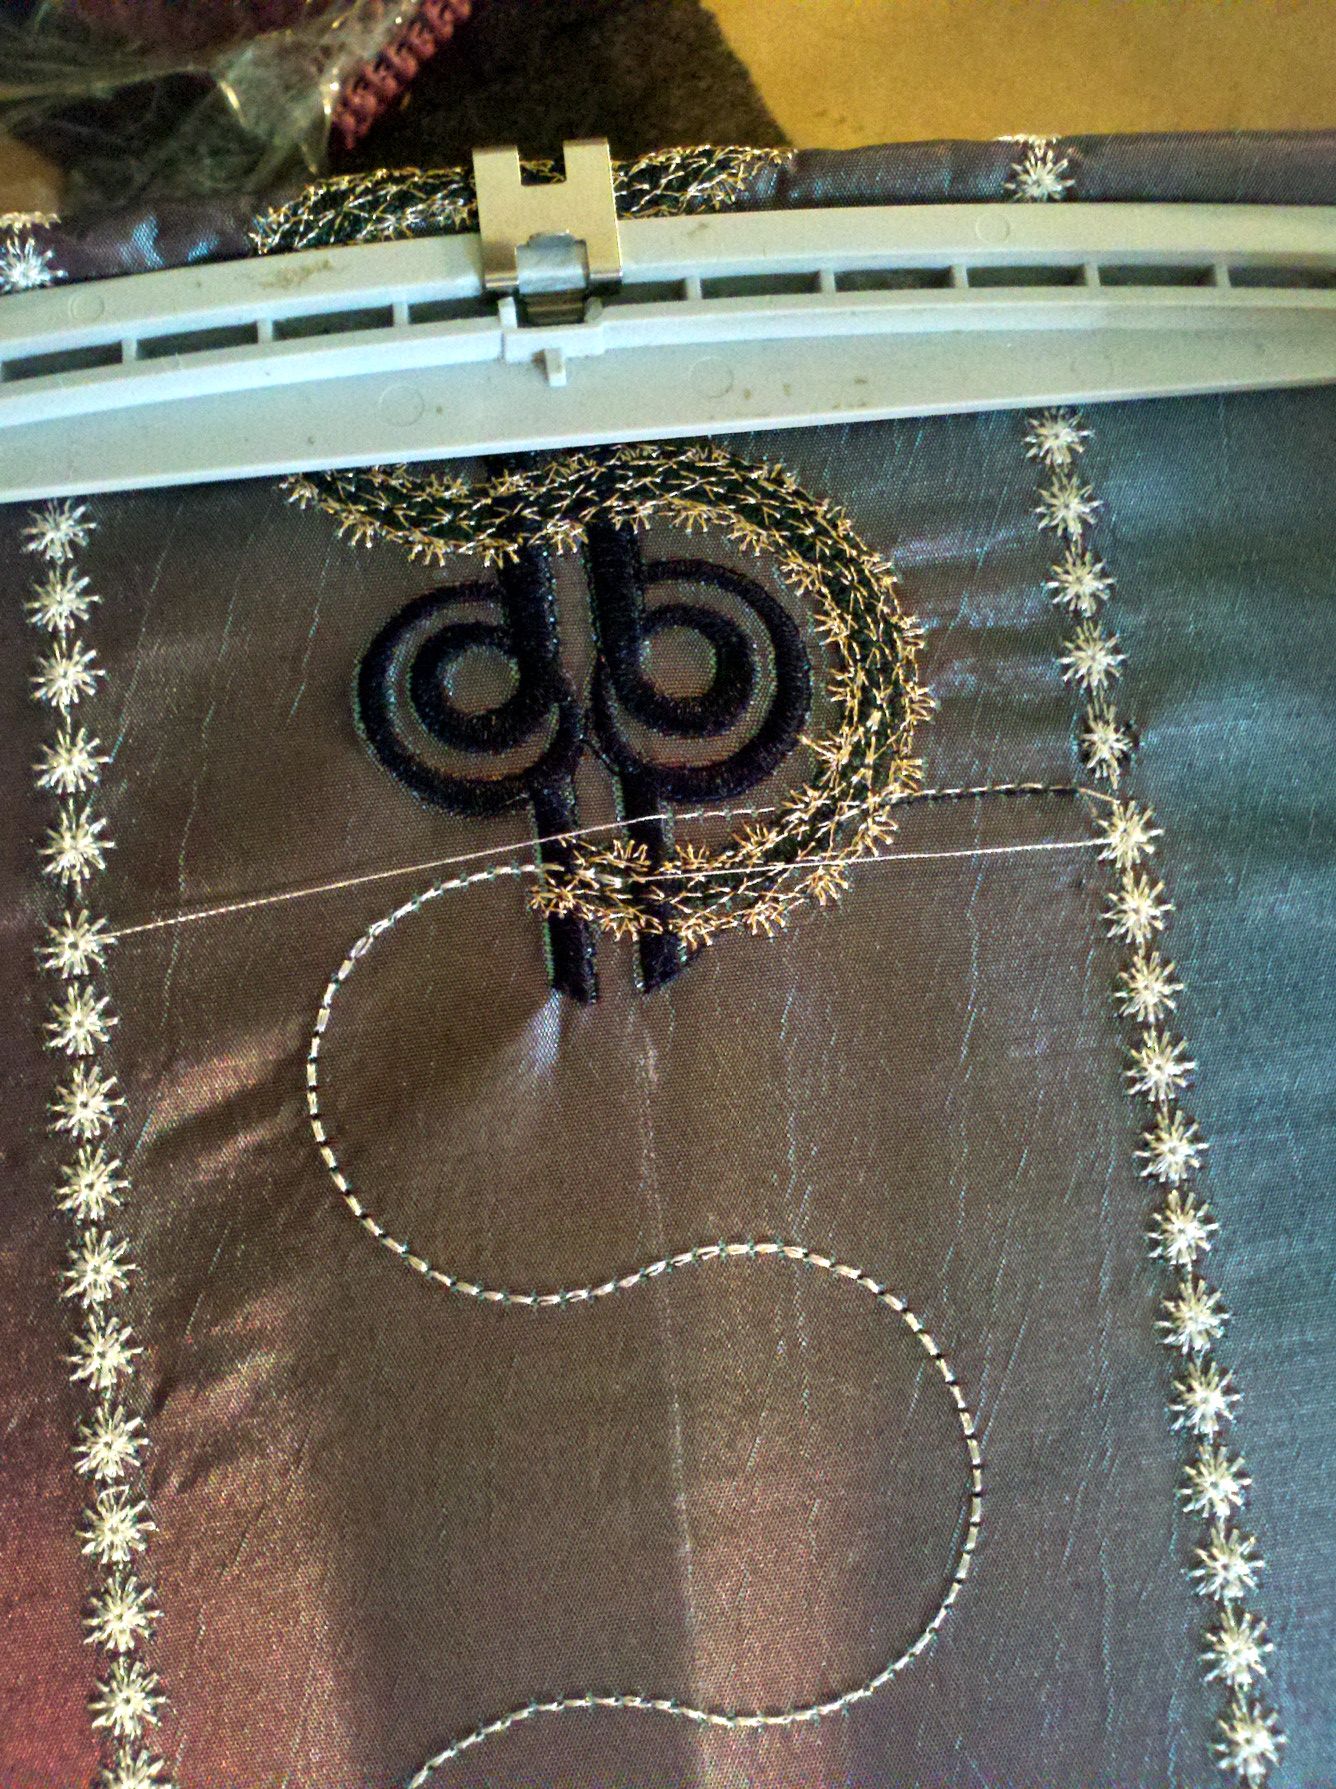 Stitching out the design for a 2nd time. You can see that the swooping 'S' from the center of the design lnes up perfectly. The pearls will too! |
 In this photograph, it is very easy to see my center line and matched up registration lines. Once you have practiced this a few times, it will be a breeze! I found the trickiest part being how far down in the hoop to overlap the preceeding stitch-out. Measuring the space above your design after your first stitch-out takes the guess work out of the placement. |
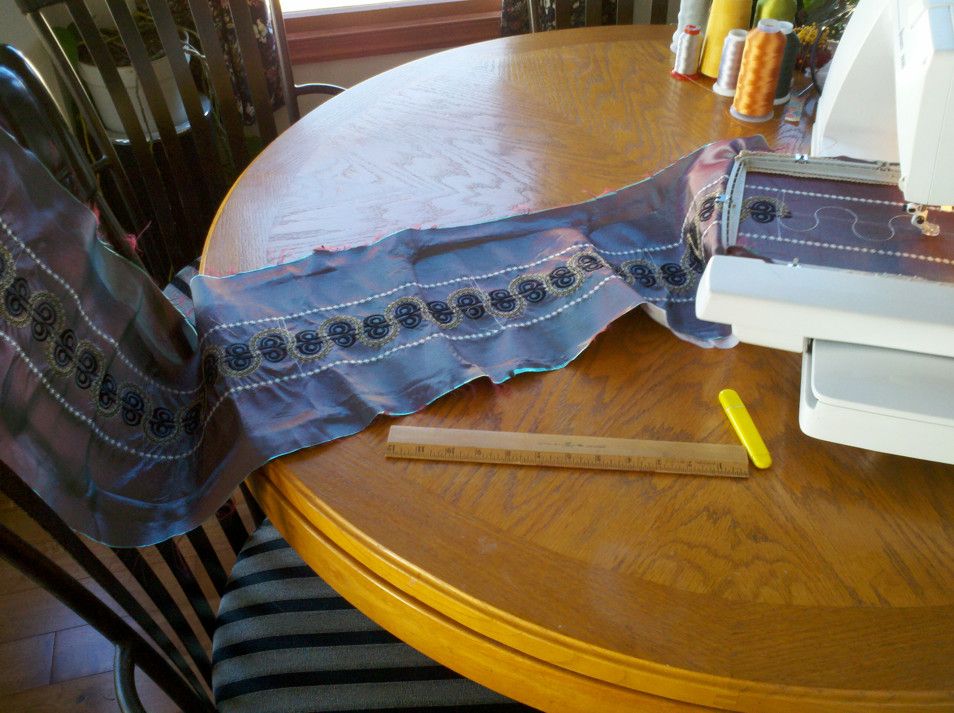 Once you get use to setting up the center chalk line and sides of a design, aligning each following stitchout gets easier and faster. I got to the point where re-hooping and aligning this design took just a couple of minutes. There were a couple of times where my pearls did not quite meet as they should; one was a stitch lower than it should be. Using my sewing machine, I simply ran a couple of stitches over the embroidered pearls using the same thread. Lengthening the pearl with a running stitch did the trick! If you have to stop stitching any time after you have started a design, Do NOT unhoop your fabric! Write down the position of the hoop, the color and the stitch you stopped on. This will save you from a major headache when you get back to work. |
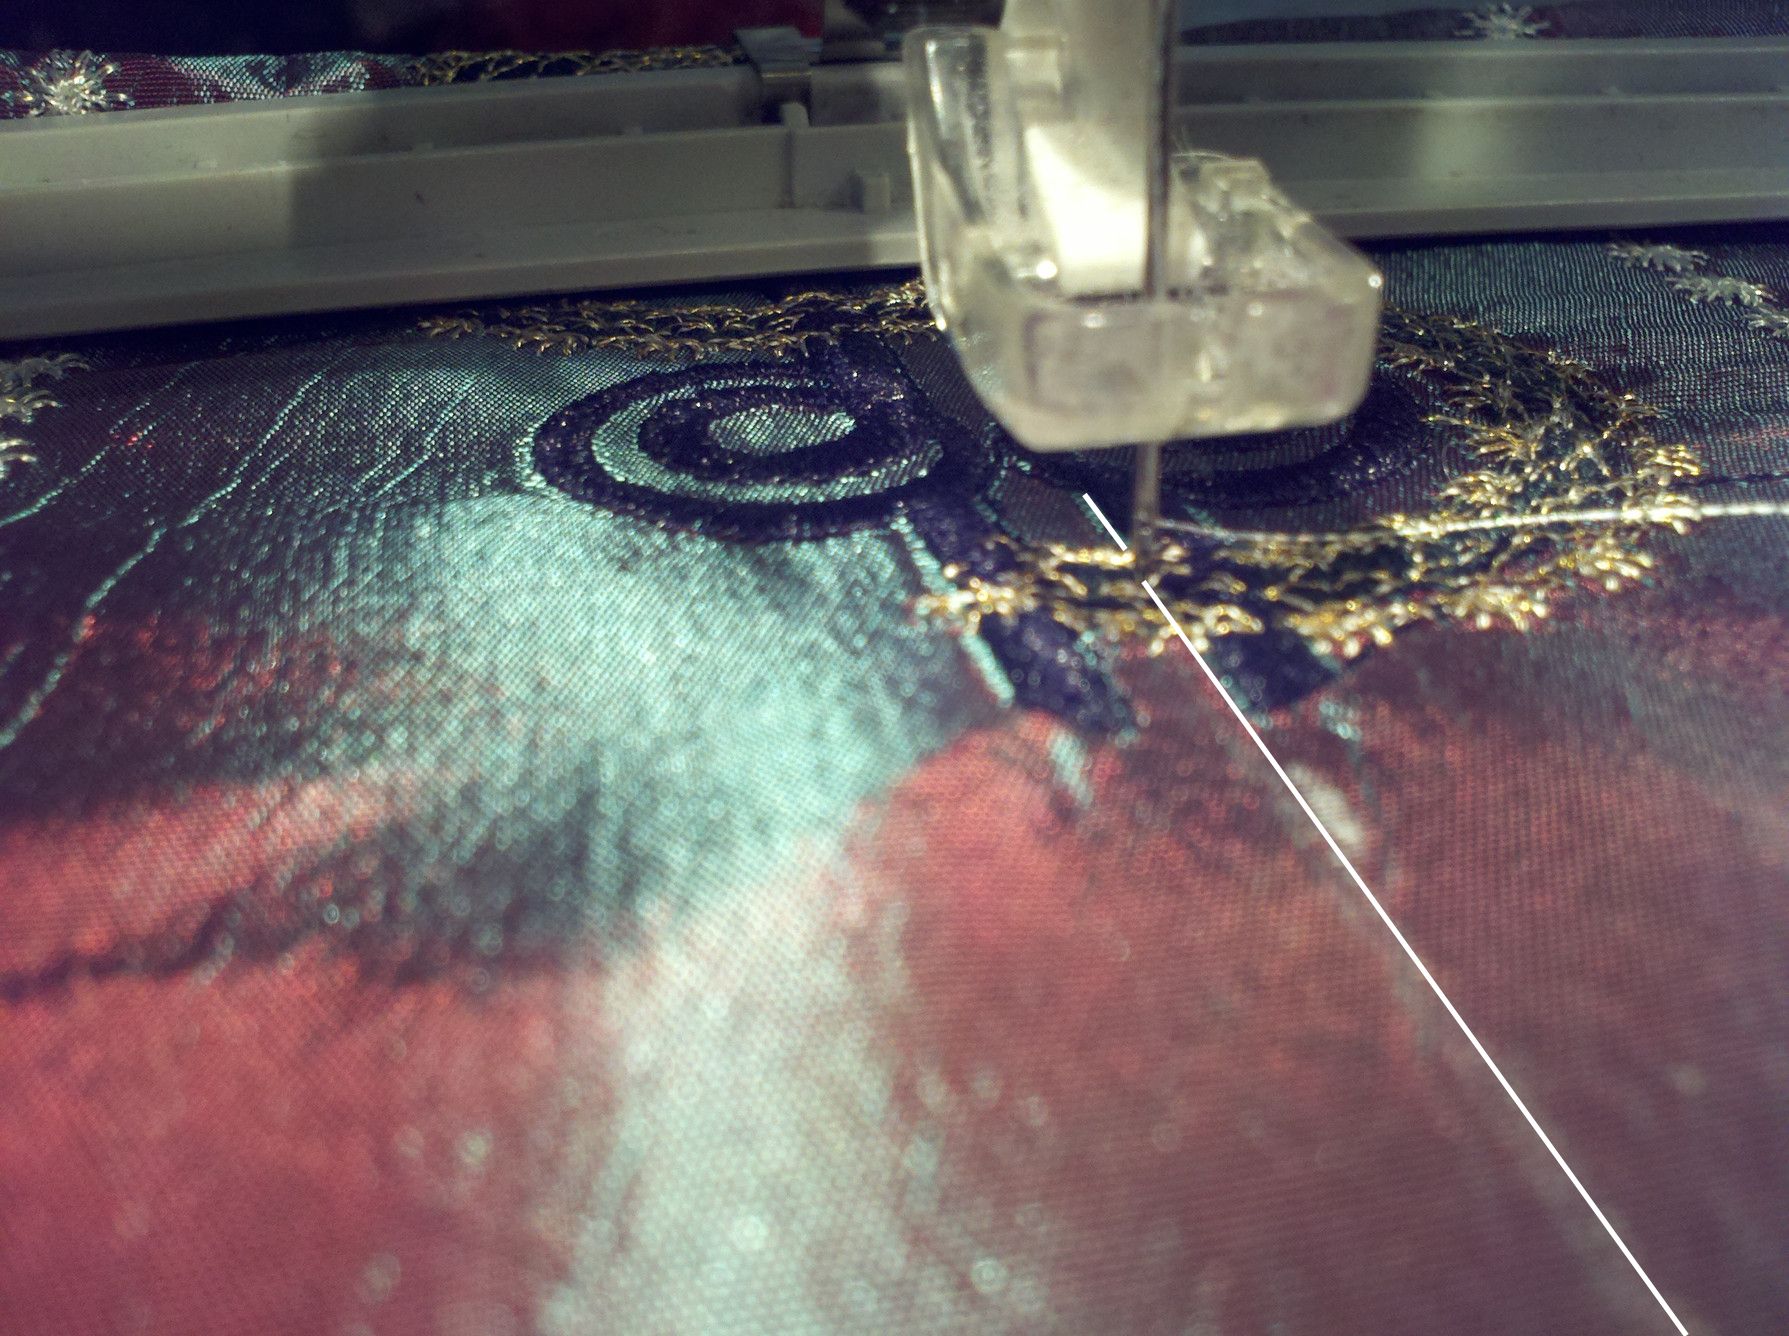
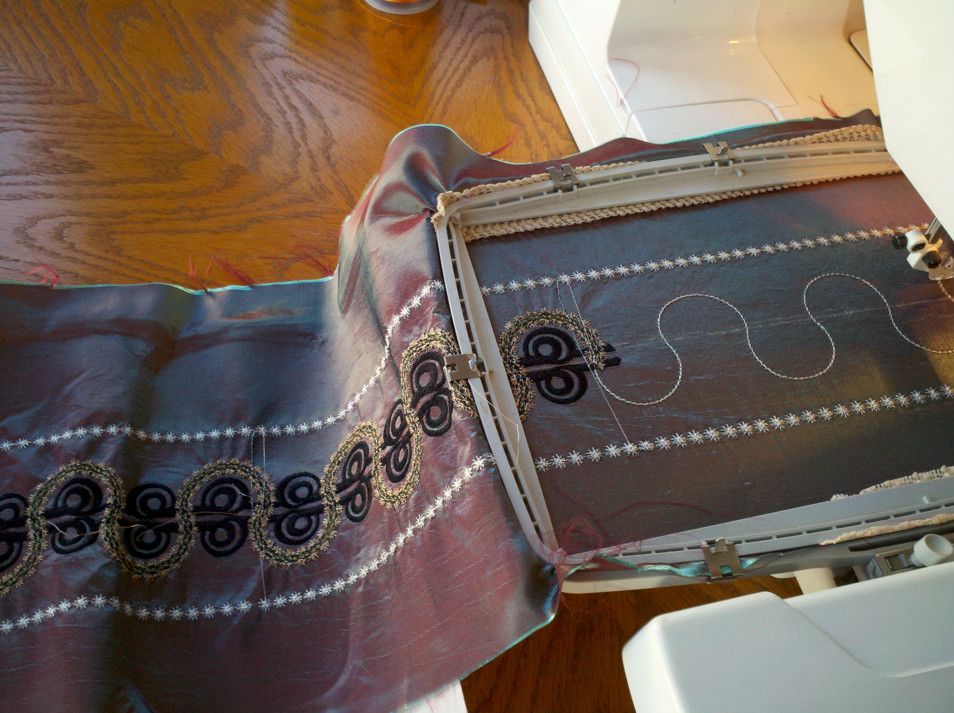
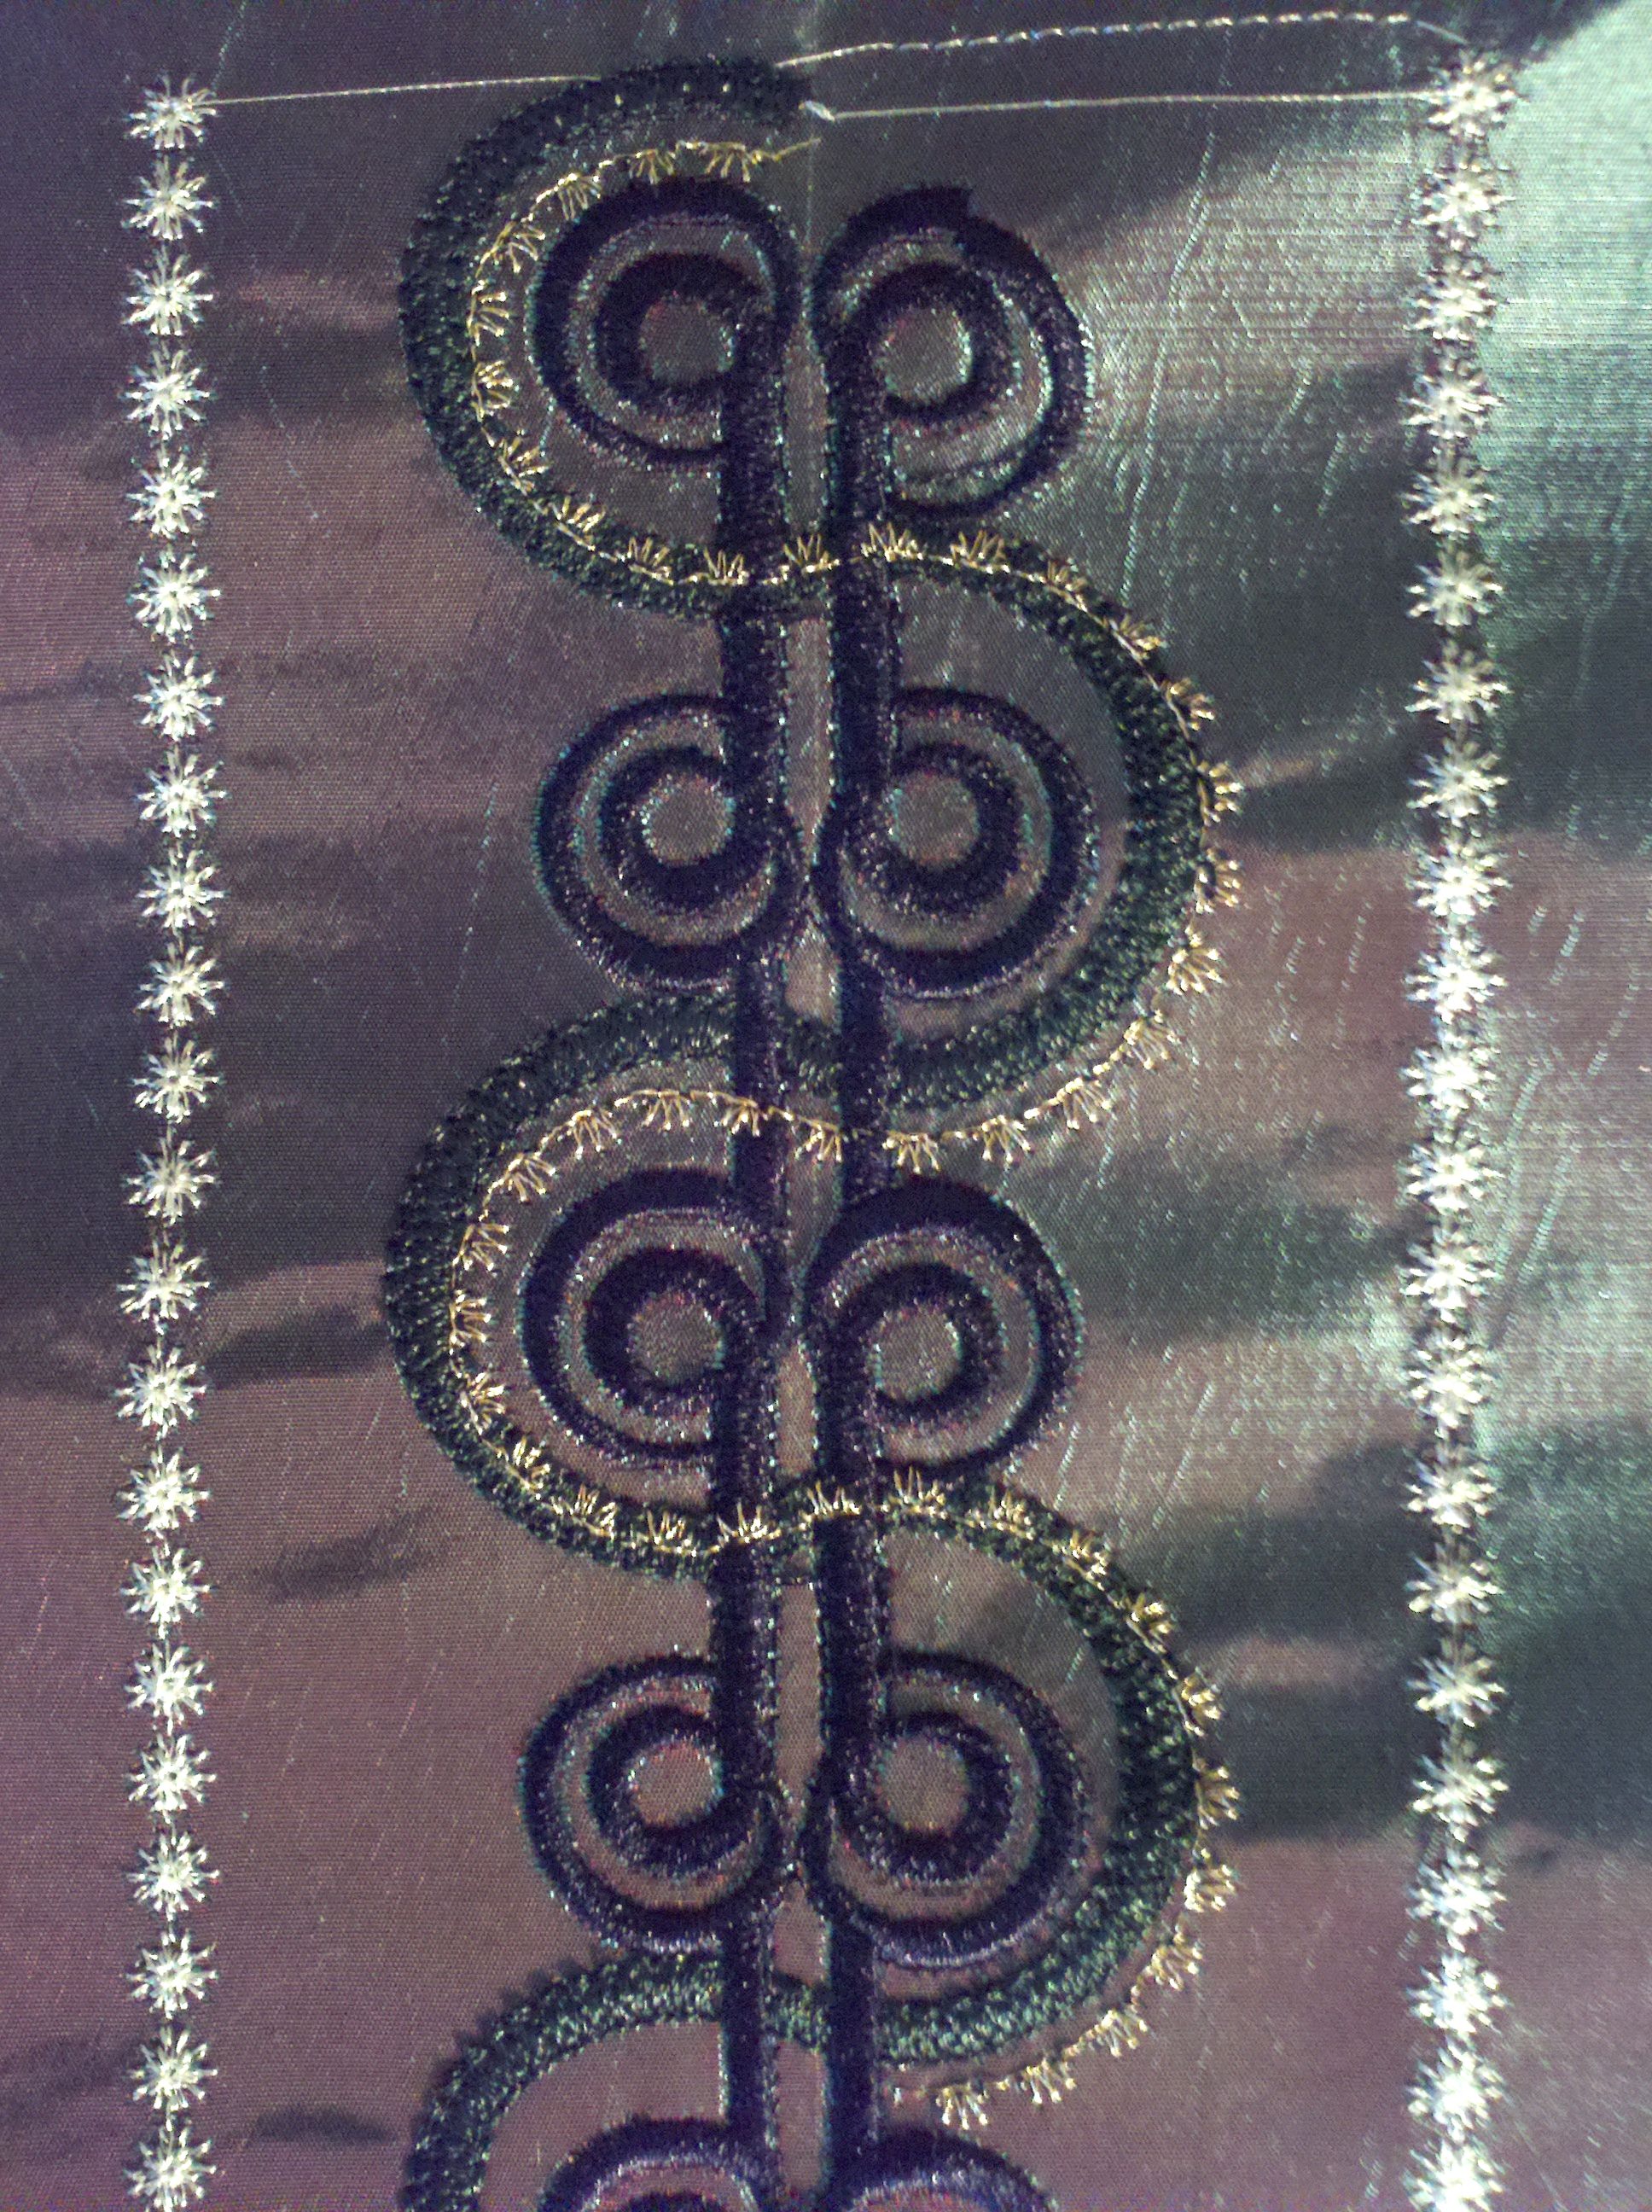 Sometimes, no matter how careful you are, your machine WILL act like it's got a mind of it's own! This photo shows that I had my design all lined up and things were going along just fine until I stitched the gold metallic thread. For reasons unknown, things went haywire and the gold started stitching along the side of the center 'S' instead of on top! Luckily, this was only the 2nd or 3rd stitching, but I had to start over. And, THIS is a good reason to have extra fabric on hand. A lot of fabric! |
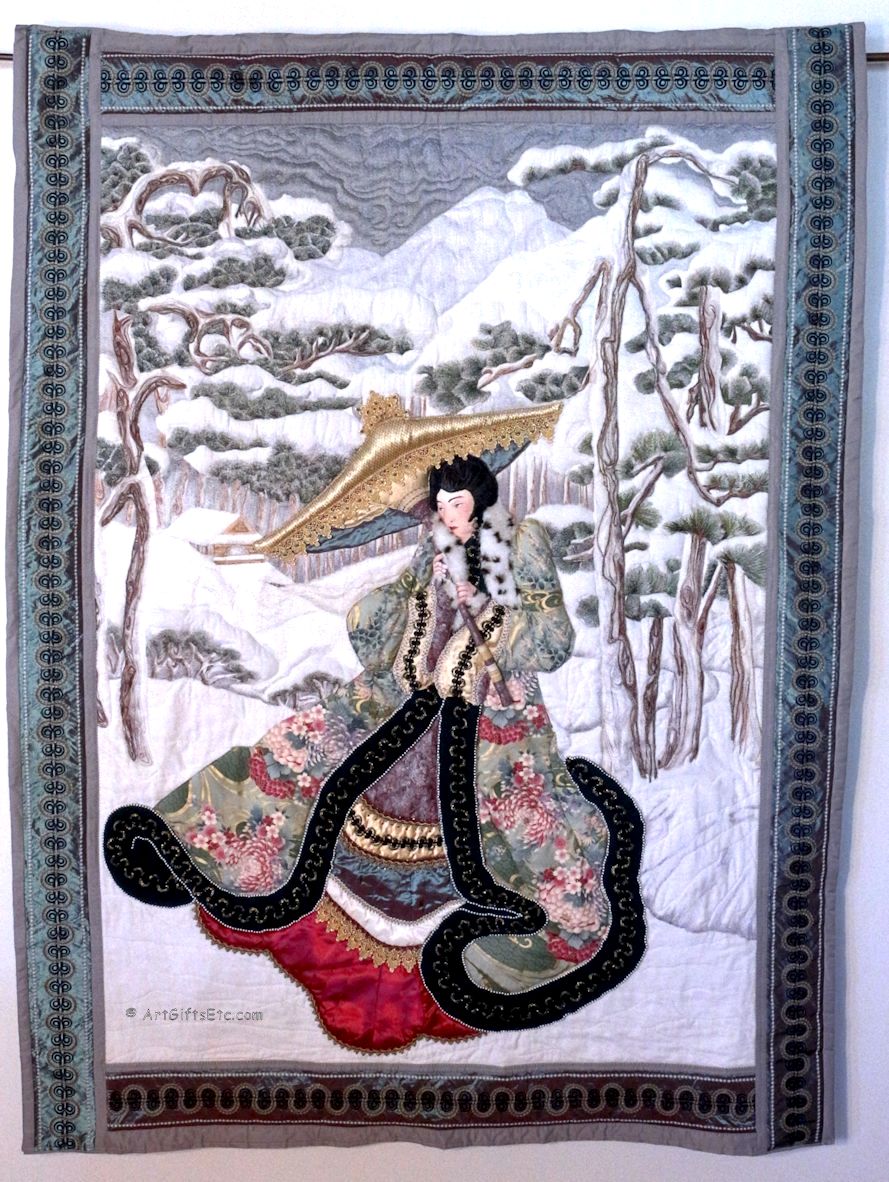 GEISHA IN THE SNOW QUILT 58x78 Winner of Best Machine Workmanship 2016 Mancuso Pennsylvania National Quilt Extravaganza! Click Here to go to my Step-By-Step Quilt Blog that shows you how I made thiis quilt |
|
|
|